Protecting your home is key, and your roof is a big part of that. The drip edge is a small but important part of your roof. It helps keep your home safe from water damage, pests, and structural problems.
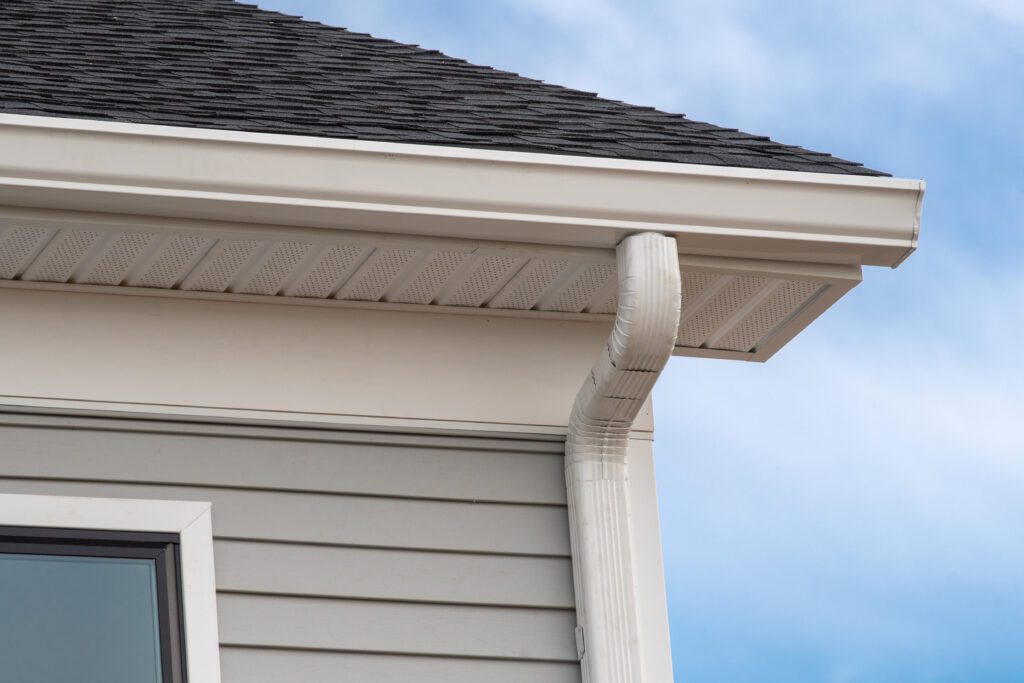
A roof drip edge is a metal sheet shaped like an L. It’s placed at your roof’s edges to keep water away from the fascia and into the gutters. Many building codes, like the 2021 International Residential Code, require drip edges for new roof installations, home building, and roof repairs.
For roof replacements or repairs, it’s important to work with skilled roofing contractors. They ensure the drip edge is installed correctly. This is true for shingle, metal, or flat roofs. A well-installed drip edge is vital for a complete roof.
In this guide, we’ll cover the purpose and benefits of roof drip edges. We’ll also look at the different materials and profiles available. Plus, we’ll give you a step-by-step guide on how to install one. By the end, you’ll know how this small part can protect your home for years.
Understanding the Purpose of a Roof Drip Edge
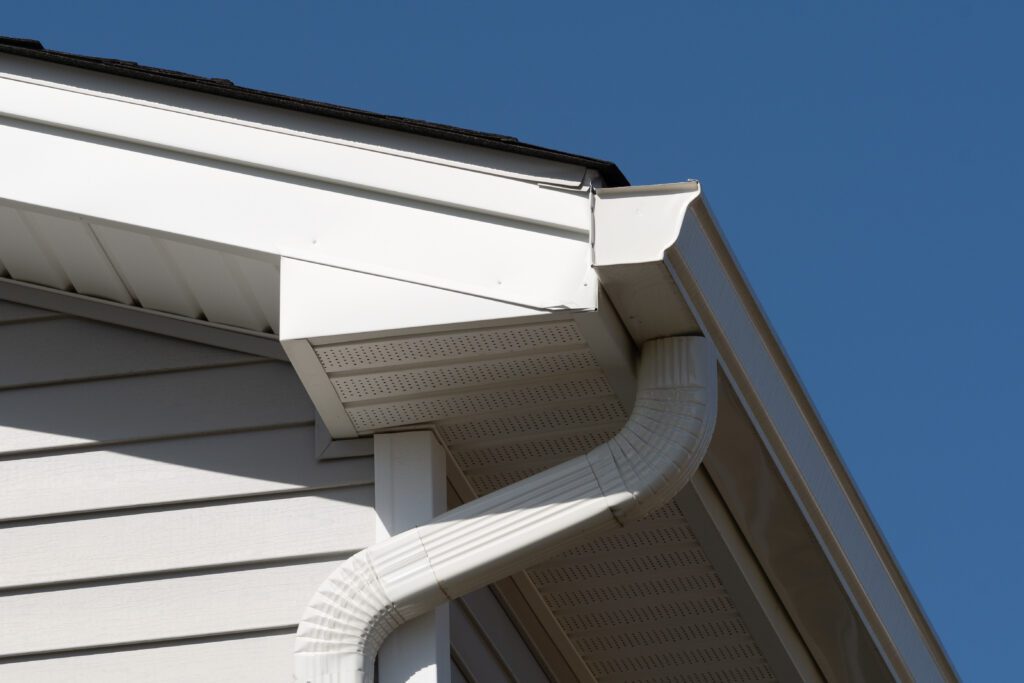
A roof drip edge is key for any roof. It directs water away from the fascia and into the gutter. It also keeps your home safe from rain pushed by wind. Installing a drip edge stops water from getting into the roof deck or fascia. This reduces the chance of leaks, rot, mold, and damage to your home’s structure.
The National Roofing Contractors Association says most building codes need drip edges for roofs. Even though not all asphalt shingle roofs have them, it’s best to install them at all eaves and rakes.
Directing Water Away from the Fascia and Into the Gutter
The main job of a drip edge is to send water away from the fascia and into the gutter. It does this by going beyond the fascia, usually by a third of the gutter’s width. This stops water from staying on the fascia, which helps avoid wood rot and other water damage.
Protecting Your Home from Wind-Driven Rain
Drip edges also protect your home from rain pushed by wind. They seal the gaps between the roof deck and fascia. This stops water from getting into the attic during bad weather. This is very important because wind damage is a common reason for insurance claims. Always talk about drip edge installation with your contractor during the roof inspection.
Types of Drip Edge Materials
Choosing the right roofing materials is key for lasting protection. The drip edge is a critical part of a good roof. It’s usually made from metals like aluminum, galvanized steel, or copper.
Aluminum Drip Edges
Aluminum is a top pick for drip edges. It’s light, doesn’t rust, and is easy on the wallet. It’s strong and can handle the weather well. You can expect to pay $1 to $3 per foot for aluminum drip edges.
Galvanized Steel Drip Edges
Galvanized steel is strong and lasts long, even in bad weather. The galvanization stops rust, so it lasts longer. It’s a solid choice for those wanting a durable drip edge.
Copper Drip Edges
Copper drip edges are for those who want luxury and longevity. They look great and get even better with age. Copper is pricey, costing $10 to $15 per foot, but it’s worth it for its lasting beauty and durability.
When picking a drip edge, think about your budget, local weather, and what fits with your roof. Always talk to a roofing expert for the best installation and to avoid future costs.
Drip Edge Profile Types and Sizes
Understanding drip edge profiles and sizes is key when looking into roofing services. Drip edges come in various shapes. Each shape has its own role in keeping your home safe from water damage during roof work.
- Type C (L-shaped): The traditional and widely used profile that effectively channels water away from the roof edge.
- Type D (T-shaped with a lower flange): Provides an additional horizontal leg for enhanced protection against water intrusion and ice dams.
- Type F (extended drip edge for use over existing shingles or on rake edges): Offers protection against wind-driven rain, specially in areas with harsh weather.
Drip edges are available in 10.5-foot or 8-foot lengths. They have overhangs from 2 to 5 inches. When installing, it’s best to overlap by 1 to 2 inches. This helps divert water, prevents wind uplift, and makes your roof last longer.
When planning your roofing services, getting advice from a professional roofing company is vital. They can guide you in picking the right drip edge profile and size. This choice depends on your roof’s needs, local building codes, and weather. Proper drip edge installation protects your home from water damage and ensures your roof lasts longer.
Step-by-Step Guide to Installing a Roof Drip Edge
Installing a roof drip edge is key to protecting your home from water damage. Most places in North America need drip edges to meet building codes. When you’re doing a roof installation, it’s important to do it right.
Preparing the Roof Deck
Start by making sure the roof deck is clean, dry, and free of debris. Look for any damaged or rotted wood and replace it. If it’s a new roof, make sure the deck is aligned and secure.
Installing Drip Edges on the Eaves
First, put the drip edge along the roof’s eaves. Make sure it’s aligned and secure it with roofing nails every 12 to 18 inches. Leave a 3/8–1/2-inch gap with the fascia to prevent water damage. Overlap each section by two to three inches for a smooth fit.
Cutting and Installing Drip Edges at Corners and Peaks
At corners and peaks, measure and cut the drip edge carefully. Use a sharp utility knife or tin snips for precise cuts. Make sure the cut pieces fit well and are securely fastened.
Installing Underlayment and Drip Edges on the Rakes
After the eaves, apply the ice and water barrier membrane. Make sure it goes from the roof’s lowest edges to 24 inches inside the exterior wall. Experts say to go up to 36 inches for better protection. Then, put the drip edge on the rakes, overlapping the eave drip edge. Secure it with nails every 16 inches.
When putting on the starter course of shingles, make sure they overhang the drip edge by 1/2 inch. Install step flashing tightly against the roof, aligned with the starter course. Use only one nail in the upper corner to avoid leaks. Lastly, install the architectural shingles, extending them 3/8–1/2 inch past the starter course.
By following these steps and local building codes, you can ensure a roof drip edge that protects your home from water damage for years.
Replacing a Damaged or Missing Roof Drip Edge

If you see water stains, peeling paint, or rotting fascia boards, it’s time to act. Not fixing a damaged drip edge can cause bigger and more expensive roof repair problems later. Homeowners usually spend between $200 and $600 to fix a drip edge, based on the damage and materials.
Identifying and Removing the Existing Drip Edge
To start, lift the shingles at the roof’s edge to see the drip edge. Check its condition and decide how much damage there is. If it’s too damaged, bent, or gone, you’ll need to take it out and put a new one in. Use a pry bar to remove the old drip edge’s nails without harming the shingles or fascia board.
Installing the New Drip Edge Flashing
After removing the old drip edge, measure the eave to cut the new one to size. Make sure the new drip edge overlaps by at least 1 inch for water runoff. Apply roofing cement along the top edge to seal it to the fascia board. Use roofing nails to secure the new drip edge, spacing them 12 inches apart. Replacing the drip edge flashing costs between $1 and $2 per foot, depending on your area’s prices.
When you replace a damaged or missing drip edge, check local building codes and get help from roofing experts. A well-installed roof drip edge prevents water damage, ice dams, and pests. This protects your home and saves you from expensive repairs later.
Benefits of Installing a Roof Drip Edge
Installing a roof drip edge has many benefits for homeowners. It boosts curb appeal and protects your home. Working with experts and using top-notch materials ensures your roof looks good and works well.
Enhancing Curb Appeal with Design Options
Roof drip edges come in many colors and styles. This lets homeowners pick one that matches their home’s look. Choosing the right drip edge can make your home look better.
Homeowners can choose from painted options or classic finishes like white or black. This helps make your home stand out.
Protecting Your Home Investment
A well-installed drip edge keeps water and pests away. This protects your home. It works with gutters to manage water, preventing damage.
In places like West Chester and Downingtown, Pennsylvania, drip edges are key. They shield against rain and flooding.
Promoting Sustainable and Eco-Friendly Practices
Using recyclable materials like aluminum and copper is good for the planet. These materials last long and reduce waste. A quality roof with a drip edge saves money and resources.
Common Mistakes to Avoid During Drip Edge Installation
Installing a drip edge is key in roof installation. It directs water away from the fascia and into the gutter. But, a small mistake can lead to water damage. Knowing these common mistakes helps keep your roof safe.
One big error is not aligning the drip edge right. It should have the longer leg over the fascia and the shorter leg under the shingles. This mistake can cause water to get in and damage the roof. Also, make sure there’s at least a two-inch overlap between drip edges. This is important for a tight seal and to stop water from getting through.
Another mistake is using the wrong fasteners or not securing the drip edge well. Roofing experts say to use roofing nails about 10-12 inches apart. This keeps the installation tight and stable. Also, using a good sealant ensures the drip edge and roof stay watertight.
When putting on starter shingles, make sure they don’t go too far past the drip edge. They should be at least ⅓ of an inch but no more than ¾ of an inch. This protects them without causing damage. Also, angle the drip edge slightly away from the fascia. This helps with water drainage and prevents rot and leaks.
By avoiding these mistakes and following the right steps, you can keep your roof safe from water damage. Regular checks and cleanings are also important. If you’re not sure about doing it yourself, get help from experienced roofing contractors. They can guide you through a successful roof repair or installation.
Maintenance Tips for Ensuring Drip Edge Longevity
To keep your roof’s drip edge working well, regular care is key. Drip edges, made from materials like aluminum or vinyl, stop water from getting in. This protects your home from damage that could cost a lot.
By checking your drip edge every year and keeping it clean, you can make your roof last longer. This helps avoid problems like rotting fascia boards and mold. It also keeps your roof decking in good shape.
Conducting Annual Inspections
Get a roof check-up every year from a trusted roofing service. They’ll look for damage, rust, or loose parts on your drip edge. They’ll also make sure it’s covered right, following building codes.
Fixing problems quickly stops water from getting in. This helps your roof last longer.
Cleaning and Maintaining the Drip Edge
Keep your drip edge clean by removing leaves and ensuring water flows well into the gutters. Paint or seal metal drip edges every few years to stop rust. Replace plastic or rubber ones if you see cracks or damage.
Good drip edge care makes your roof work better. It also protects your home’s value.
If you find big damage or can’t reach some areas, talk to a pro like Straight Forward Construction. We know how to fix and install drip edges right. This keeps your roof safe and prevents expensive water damage.
The Importance of Proper Roof Drip Edge Installation
Installing drip edges correctly is key to keeping your home safe from water damage and pests. The Environmental Protection Agency (EPA) says drip edges are a top way to manage moisture. These metal strips, usually made of galvanized steel, aluminum, or copper, go beyond the fascia and are at least one-third of the gutter’s width.
Getting a pro to install your roof, including drip edges, can save you money in the long run. It makes your roof last longer, saves energy, and boosts your home’s value. Roofing experts are best for this job to avoid mistakes that can cause water damage and wood rot.
The 2018 International Residential Code (IRC) says drip edges must be at the eaves and gables of shingle roofs. It requires a 2-inch overlap between pieces and a 1/4-inch drop below the roof decking. The underlayment must also cover the drip edge at the eaves and the gables.
In many parts of the U.S., building codes require drip edges for their benefits. Winter is a risky time for roofs, and drip edges help prevent ice dams. If not installed right, it can lead to roof problems and fail inspections.
When looking for roofing services, choose experienced pros who know how to install drip edges correctly. Our team has over 30 years of helping homeowners understand roof components. We’re committed to providing quality roof installation services to protect your home for years.
Conclusion
A roof drip edge is key for a good roof. It keeps water away from your home, making your roof last longer. There are many types of drip edges for every home and roof.
Installing a drip edge right is important. You should avoid mistakes like not having enough overhang or not sealing it properly.
It’s smart to get professional help for installing a drip edge. They know how to do it right and make it last. The cost depends on the material, size of your roof, and who does the work. But, it’s worth it to protect your home.
FAQs About Roof Drip Edge
What is a roof drip edge, and why is it important?
A roof drip edge is a metal strip at the roof’s edge. It directs water away from the fascia and into the gutter. This helps protect your home from water damage, pests, and structural problems.
What are the main purposes of a roof drip edge?
A roof drip edge has two main jobs. It directs water away from the fascia and into the gutter. It also protects your home from rain driven by wind. This prevents water damage and keeps your home safe.
What materials are drip edges typically made from?
Drip edges are made from metals like aluminum, galvanized steel, or copper. Aluminum is light and affordable. Galvanized steel is strong and durable. Copper is luxurious and lasts a long time.
What are the different types of drip edge profiles available?
Drip edges come in different shapes, like L-shaped and T-shaped. They also have extended versions for over existing shingles. They come in 10.5-foot or 8-foot lengths, with overhangs from 2 to 5 inches.
How do I properly install a roof drip edge?
To install a drip edge right, start by preparing the roof deck. Install the drip edges on the eaves first. Then, cut and fit them at corners and peaks. Remember to follow local building codes and best practices for a good job.
Can I replace a damaged or missing drip edge myself?
To replace a damaged drip edge, lift the shingles first. Remove the old drip edge and install the new one with roofing cement and nails. Always check local building codes and get help if needed for a proper job.
What are the benefits of installing a roof drip edge?
Installing a roof drip edge has many benefits. It makes your home look better with different colors and styles. It also protects your home from water damage and pests. Plus, it’s good for the environment by using recyclable materials.
What are some common mistakes to avoid during drip edge installation?
Don’t make these mistakes when installing a drip edge. Avoid improper alignment and not overlapping enough. Make sure to secure it well and use the right fasteners. Also, remember that materials can expand and contract.
How do I maintain my roof drip edge?
Keeping your roof drip edge in good shape is important. Check it every year for damage or rust. Clean it regularly and paint it every few years to protect it.
Why is proper roof drip edge installation essential?
Proper installation of a roof drip edge is key to protecting your home. It’s a smart investment that can save you money in the long run. It also makes your roof last longer and can increase your home’s value.